Wednesday, November 7, 2012

A VEGGIE SUPPER


RAINBOW CHARD AND MUSHROOMS 


SERVES 2

1 head of chard
1 tbsp olive oil
1 red onion, finely sliced
1 garlic clove, crushed
1 medium red chilli, finely chopped, plus extra to garnish
4 field mushrooms
100g good quality mozzarella
handful mint leaves

Separate the chard leaves from the stalks. Bring a pan of lightly salted water to the boil and drop in the chard leaves for 2 minutes until wilted. Drain, refresh under cold water and, after squeezing out excess water, set aside. 

Heat the olive oil in a frying pan or wok and add the onion. Fry on a low-medium heat for 5 minutes until just soft. Add the chard stalks and continue to fry for another 5 minutes. Then, add the garlic and chilli. Cook for 1 minute more, then season well with salt and pepper. 

Preheat the grill to high. Lay the mushrooms on a baking sheet, top with torn mozzarella, drizzle over a little olive oil and season generously. Place the sheet under the grill and cook for 5 minutes until the mozzarella is bubbling and golden and the mushrooms have softened. 

Meanwhile, reheat the chard stalks and onions and stir through the chard leaves. Tear the mint leaves and, reserving a few for a garnish, mix through the chard.

Remove the mushrooms from the grill and serve on top of the chard mixture with the remaining mint leaves and a little more chopped chilli, if you like.

Thursday, October 18, 2012

GUINEA FOWL DUMPLINGS

I'm crazed over little wanton wrappers and, despite having to queue through the back door of Loon Fung for them, they're within (quite) easy reach for a last minute supper, or sneaky dim sum in the middle of the day.  You can even cook them in the office microwave.

They're a great vehicle for leftovers - the weekend's roast, a couple of raw prawns that need cooking, shrinking vegetables, or stray rice noodles at the bottom of the packet.

For this recipe I used leftover stuffed guinea fowl made by my darling housemate - all hard work done. Make sure you have always have fish sauce, sesame oil and rice wine vinegar on hand and you're away. Peel the wrapper, fill it, crimp it, steam it, dip it and pop it in.

 ASIAN-STYLE BROTH WITH GUINEA FOWL DUMPLINGS


SERVES 2

ingredients

FOR THE DUMPLINGS
150g leftover guinea fowl, roughly chopped
2 tsp sesame oil
1 tsp fish sauce
1/2 tsp rice wine vinegar
1 spring onion
10 wanton wrappers

FOR THE BROTH 
750ml guinea fowl stock (or chicken)
3 tbsp fish sauce
1 tbsp mirin rice wine
1 tbsp soy sauce
2 star anise
thumb-sized knob of ginger, peeled and finely sliced
1 red chilli, finely sliced at an angle, extra to serve (optional).
5 shitake mushroom, sliced
3 spring onions

Place all the dumpling ingredients in a food processor, and blitz to a rough paste. Transfer to a small bowl, cover and set aside.

Heat the guinea fowl stock in a medium-sized saucepan over a medium heat. Add the fish sauce, rice wine and soy sauce and bring to the boil. Turn down the heat and add the star anise and chilli. Cook on a low simmer for 10 minutes so all flavours can infuse.

Meanwhile, assemble the dumplings. Lay a dumpling wrapper in the palm of your hand and place a heaped teaspoon of the mixture in the centre. Fold up the sides around the filling to form a flower shape. Press to hold, using a little water to bind if necessary. Place on a lightly floured and continue until all the mixture has been used.

Drop the dumplings into the simmering broth along with the shitake mushrooms and cook for two minutes until the pastry is soft and they are hot all the way through. Ladle the broth into two bowls and divide up the dumplings. Scatter with the spring onions and the extra red chilli. Serve with a cold beer and extra soy sauce. 

Wednesday, September 26, 2012

RED PRAWN AND PAPAYA CURRY

After a heavy day on the food - testing three giant roasts in a day and and eating most of them - a supper of fruit and fish proved sufficiently antidotal. This serves perfectly as a simple midweek winner, bright and lively, and takes no time at all. 

RED PRAWN AND PAPAYA CURRY


serves 2

ingredients

2 tbsps olive oil
180ml coconut milk
2 tbsps red curry paste (this is a good quantity for Thai Taste Massaman Red Curry, but brands can vary hugely - taste before you paste)
1 tsp fish sauce
1 tsp palm sugar (or caster if you can't find any)
150g raw king prawns
100g mangetout
1 papaya, peeled, deseeded and cubed
2 tbsps chopped coriander leaves to serve
150g rice

Rinse the rice and add to a large sauce pan with 1 1/2 the amount of water to rice. Bring the rice to the boil and turn to a gentle simmer. Cover with a lid, tilted so the steam can escape, and cook for approximately 15 minutes. Drain any excess water and fluff up.

Meanwhile, heat the olive oil in a deep frying pan or wok and add 1 tablespoon of the coconut milk. Stir and add the curry paste. Add the fish sauce and palm sugar. Pour in the the rest of the coconut milk, bring to the boil, and add the prawns. Turn down to a gentle simmer and cook for 2 minutes to reduce the sauce. Add the mangetout and papaya and cook for another minute.

Serve the curry with the rice, and the chopped coriander leaves.

Saturday, September 22, 2012

AUTUMN COLESLAW

I adore this dish. The colour kicks us straight into autumn - bright pink and vibrant. It keeps to all the promises of a perfectly constructed salad: sweet crunch from the roots, creaminess from the yoghurt, citrus to cut through, a light nuttiness and a well-balanced freshness from the herbs.


It works wonderfully well alongside meat, hot or cold - a classic pulled pork, leftover roast ham or crispy chicken wings - or seasonal fruits - pears, apples or plums.

I could eat this for every meal. Even breakfast.

BEETROOT, CELERIAC & CABBAGE COLESLAW

serves 8


ingredients

1/2 white cabbage
1/2 celeriac, peeled and grated
3 small beetroot, peeled and grated
finely grated zest and juice 1 large lemon
2 tbsps greek yoghurt
sesame seeds to garnish, optional
large handful mint, finely shredded
large handful coriander, finely chopped
olive oil to dress

Add the grated beetroot to a large bowl (not the one you are going to serve the coleslaw from). Finely shred the white cabbage, discarding the tough core and slicing up any large pieces, and add to the beetroot with the celeriac. Add the lemon zest and juice, and lightly toss - you want to avoid over tossing the beetroot at this stage as it will stain the other vegetables.

Keep covered in the fridge until you are ready to eat it. Just before serving, stir through the yoghurt so that it is evenly distributed. Move to a clean bowl, then dress with the sesame seeds, mint and coriander. Drizzle, generously, with olive oil.

* If you are not going to eat all of the coleslaw, leave aside some of the salad after adding the lemon juice. Any leftovers can keep for up to three days or can be cooked up as an autumn gratin. Butter an oven-proof dish and pour in the lemony root vegetable mix. Pour over cream, season, grate with parmesan and bake for 25 minutes in a hot oven (200°C/fan180°C/gas 6). Heaven.

Tuesday, September 4, 2012

PRUNE AND RICOTTA FROZEN YOGHURT

PRUNE AND RICOTTA FROZEN YOGHURT
Not too greedy.


SERVES 4-6

ingredients

250g ricotta
200g natural yoghurt
250 prunes, pitted and chopped
1 tbsp dark brown Muscovado sugar
pinch salt

Blend all the ingredients together until almost smooth. You want 70% of the prunes to dissolve and the rest to keep a bit of shape.

The prunes will be sweet already so there is no real need for added sugar in this recipe, but I think a spoonful of dark brown muscovado really enhances the flavour.

Now, for freezing. If you have an ice cream machine, turn for 45 minutes before transferring to the freezer for a couple of hours. If no machine, place the blend in a metal boil with tin foil as a lid and stir every half hour for 3 hours.

Serve as a sticky after dinner desert with a shot of coffee, or piled on pancakes for breakfast.

Sunday, August 26, 2012

SUMMER SAUSAGES

I spent a very wet Saturday stomping around Broadway market, sheltering under green-striped tarpaulins, standing nose to nose with the marketeers. I scooped up two old cushions, a greedy burger form Lucky Chip, two corn on the cob and a couple of peculiarly shaped courgettes. Despite the sodden shoes and soggy mop, it was quite a perfect day. 

This sausage dish is a great cheerer on a wet day and needs very few ingredients to give a great supper. Get bonne saucisse, a bunch o' cherry tomatoes, strange courgettes and an onion. And that's pretty much it. I love it. 

SUMMER SAUSAGES


serves 4

1 tbsp olive oil
8 pork sausages
1 large echalion shallot, sliced
3 garlic cloves, crushed 
20 cherry tomatoes
2 courgettes (custard white are fun)
1 tbsp passata
50ml water
salt and pepper
handful sweet basil, torn


Heat up the olive oil in a large, deep frying pan over a medium heat. When hot, add the sausages and cook for 10 minutes with a lid on, turning occasionally to brown evenly.

Chop the sausages with a wooden spoon and add the onion and garlic. When the onion has softened, throw in the tomatoes. Cook for 5 minutes and add the courgettes. Season and stir.


Now add the passata and the water and simmer for 5 minutes. When the sauce has reduced, tear up the basil and stir through. Serve with a well-dressed salad and a hunk of bread for mopping. Dead cosy like.

Monday, August 13, 2012

PASTA AL POMODORO


Emily picked this recipe up from her days as a nipper in Naples, one of those 'gran segreti dalla nonna' that no-one who'd tried it would dare forget. We ate the sauce - fat ripe tomatoes simmered down into a rich, sticky, and oily passata - tossed through beautifully formed Umbrian pasta and mopped up the remainder with hunks of bread.

REAL ITALIAN TOMATO SAUCE
with flat pasta


serves 8
ingredients

250ml extra virgin olive oil
4 cloves garlic, sliced
15 very ripe, fresh plum tomatoes, peeled and left whole
handful basil leaves, torn
salt and pepper to taste
large jug water 
700g good quality pasta - this sauce works particularly well with flat or tubed pasta.
Parmesan to serve

Gently warm the oil in a large saucepan and add the garlic to infuse. Leave it to soak up the flavour for 3 minutes, without burning the garlic. Add the peeled tomatoes and basil to the pan, season, and leave to simmer over a low heat with the lid on. After about an hour the juice of the tomatoes will have thickened. Add a generous splash of water and leave to reduce for another 45 minutes. You want to cook down the tomatoes for a total of three hours to get the maximum flavour, so every time the sauce thickens add a little more water - you may only need to do this once more but keep an eye. As you reach serving time, make sure the sauce is thick enough to coat the pasta and is not watery. If in doubt, simmer a bit longer without adding more water. Taste for seasoning.

Bring an extra large pan or two medium sized pans of salted water to the boil and add the pasta. Cook as the packet suggests, and drain when al dente. 

Transfer the pasta into the tomato pan and mix through evenly adding a little sprinkling of salt. Pour the pasta into a big serving dish and take to the table. Divide into smaller bowls and scatter with Parmesan.

Friday, August 3, 2012

GAZPACHO

CLASSIC GAZPACHO


serves 8 bowls

ingredients

1kg ripe plum, beef, and cherry tomatoes, peeled and chopped
3 large red peppers, cored and chopped
1 large cucumber, peeled and chopped
200g white breadcrumbs
3 cloves garlic, chopped
500ml iced water
150ml white wine vinegar
150ml olive oil
salt and pepper

for garnish
3 pink echalion onions, very finely sliced
handful basil leaves
2 small dried red chillies, crushed

24 ice cubes

Place the tomatoes, peppers, cucumber, breadcrumbs and garlic into a food processor and blitz until smooth, adding the water a little at a time. You may have to do this in batches. Once smooth, add the vinegar and olive oil and season to taste. You want the soup to taste fresh, a little sharp from the vinegar, and rich with flavour. 


Leave the soup to chill in the fridge for an hour and serve ice cold with a scattering of the onions, basil and chilli. Season with salt, drizzle with olive oil and a few ice cubes. 

Thursday, July 26, 2012

MELANZANE PARMIGIANA

I'm drawn to vegetables of unusual colour and size. Bulbosities stare at me from shop shelves and I can't help but stretch out for them. They make great paintings - you can get away with wild imperfections on the canvas too - and become beautiful ornaments for the middle of the table. 

The best thing is, once you've had enough of painting, you can cook them.


Umbria has buckets of choice with local farms and Agriturismi pushing forward the overripe uglies - long pointy radicchio, tiny green figs and bunches of scarlet onions stalks still on. My baskets are breaking at the straps. 

These fat and round aubergines - pale pink, mauve, deep purple and deadly nightshade - are my favourite and make for a wonderful Melanzane Parmigiana, dished up for lunch with salad and ham. 


MELANZANE PARMIGIANA
Baked aubergines


serves 6-8

ingredients

1 red onion, finely chopped
2 cloves garlic, crushed
2 tins good quality chopped tomatoes
dried herbs, chopped (oregano, rosemary, thyme)
salt and pepper
5 tsps olive oil
2-3 large round aubergines, sliced
large handful basil leaves, torn

200g block Parmesan, grated
100g breadcrumbs
200g mozzarella

Preheat the oven to 180C. 

Add a little drizzle of olive oil to a saucepan and add the onion. Fry over a medium heat until soft. Add the garlic and dried herbs and tomatoes and cook for 10 minutes until the sauce has reduced and tastes sweet. 

Add the olive oil to a large frying pan or griddle and whack up the heat. Lay on the aubergine - cooking in batches if necessary - and fry evenly on both sides. You want to char slightly. Once you've done the lot, set aside. 

Once you have cooked down the tomatoes, ladle a layer of the sauce into the bottom of an oven-proof dish (I used a 30 x 30cm dish). Follow with a layer of aubergine and a layer of grated Parmesan. Continue this process until you use up the remaining sauce and aubergines, finishing with a generous layer of Parmesan. Evenly scatter over the breadcrumbs. Tear up the mozzarella over the crumbs as a final layer. 

Place the dish in the oven and bake for 25 minutes until the top is golden and bubbling. 

Saturday, July 21, 2012

POSTCARDS FROM ITALY

For the next four weeks I will be stationed in Italy, writing, painting and gearing up for joining the delicious. team as their cookery assistant in September. I'll be posting recipes with an Italian feel no doubt and, due to the amount of food I intend to eat, there'll be coming through fat and often. Stayed tuned and let me know of any Umbrian specialities I should be on the scout for. A dopo!

Thursday, June 28, 2012

ELDERFLOWER POSSETS

Possets are my go-to pudding - always delicious and easy on the pennies. Just make sure you don't burn the cream. 

ELDERFLOWER POSSETS


serves 6

ingredients

750ml cream

225g caster sugar

juice and zest of 1 lemon

75ml elderflower cordial


Pour the cream and the sugar into a pan and bring to the boil, stirring to dissolve the sugar. Let the mixture simmer for 2 minutes and remove from heat. Add the zest, juice and cordial and stir. 

Pour the mixture into ramekins (I used 8cm diameter) and leave to cool. When they have had time to cool down, cover with cling film and chill and set for 1 hour.

Serve with a dusting of icing sugar and a few raspberries. 

Friday, June 22, 2012

ASPARAGUS, PEACH AND BASIL SALAD


A beautiful and uncomplicated
ASPARAGUS, PEACH AND BASIL SALAD
with cured ham
inspired by Clara


serves 4

ingredients

3 bunches fine asparagus (roughly 8 stems each), snapped at base
2 ripe yellow flesh peaches, sliced
generous handful basil leaves, torn
generous pinch salt
100ml olive oil
200g cured ham (Parma/Serrano)

Bring a large pan of water to the boil. Add the snapped asparagus stems to the water and simmer for 2-3 minutes until they are bright green and still have a bit of crunch. Drain and refresh under cold water. 

Place the asparagus in a large bowl and scatter the peach slices and torn basil leaves. Drizzle with olive oil and season with salt. Toss and serve with the ham. 

Saturday, June 16, 2012

MAC AND CHEESE

I love cooking mac and cheese in disposable tin trays. They look like something you'd pick up from the school canteen, (Mrs Wiggins don't do china), serving up no-frills nursery food in no-frills containers. It puts macaroni cheese in its rightful place as stodgy, cheesy, creamy comfort food. Nowt fancy, like. Just (unbelievably) tasty.

I've gone a little off track with this recipe - leeks, ham and tarragon (ooh er), and tortiglioni in place of macaroni - but a good 'old fashioned' you can't beat.

LEEK, HAM AND TARRAGON MAC AND CHEESE


serves a very greedy 2 - a polite 4 

ingredients

200g tortiglioni or penne (or any old tube)
100g unsalted butter
1 large leek
250g smoked ham
150g flour
500ml milk (whole or semi)
200g mature cheddar, grated, and extra for the crust
salt, pepper 
handful tarragon leaves, roughly chopped
two tin trays (roughly 20x10cm)

Preheat the oven to 200C.

Bring a pan of salted water to the boil and add the pasta. Cook til al dente and drain. Refresh under cold water and set aside.

Melt 25g of the butter in a small sauce and throw in the leeks. Cook over a low heat with a lid for 10 minutes so the leeks become soft and buttery. Add the ham and a pinch of salt and pour the mixture into a bowl. Set aside.

Melt the rest of the butter in the leek pan. Add the flour and set over a low heat. Fry the flour and butter for a minute or two so the gluten can develop. Add the milk a little at a time or each time the sauce thickens, and stir constantly. This should take around 5-7 minutes

When the sauce is glossy, and creamy, add the cheese, salt and pepper.

When the cheese has melted, stir in the leek mixture and the tarragon. Taste the sauce and add a little more salt if necessary.

Combine the pasta with the sauce and divide between the two tins. Ideally, you want a generous amount of sauce to pasta.

Grate the extra cheese over each dish and place in the oven for 15 minutes to crisp up.

Best served with a mustardy salad and a dollop of ketchup.

Peas are a good veggie replacement for the ham. Throw them in as you add the tarrgon.

Ding-a-ling. Back to class.

Tuesday, June 5, 2012

ROAST PULLET

HEAR YE HEAR YE. 

Ginger Pig have just plumped up their poultry counter with a collection of gorgeous looking birds. 

I nabbed a couple of pullets (100 day old chooks) for an 8 person dinner party and they were deliciously tender. Roast these young'ns at a lower heat and for a little bit longer than you would the older gals. They will be pulled from the oven juicy and succulent and, once rested, will produce a fine feast for fine friends. 

ROASTED PULLET 


with Orange, Radish and Chicory Salad

serves 8-10

ingredients

2 x 0.9kg pullets
1 orange, halved
1 onion, peeled and halved
100g butter
1 large garlic clove
1 generous bunch thyme
1/4 tsp flaked sea salt

for the salad dressing
1 tbsp cider vinegar
1/2 tsp sugar
1/2 tsp Dijon mustard
3 tbsp olive oil
squeeze orange
salt and pepper

for the salad
9 heads pink chicory, quartered
16 breakfast radishes, stalked and halved
handful of dates, chopped (optional)
2 juicy oranges, peeled and sliced


Preheat the oven to 160C. 

Place the chickens on a large roasting tray. Squeeze the orange halves into the tray and put a half into the cavity of each bird. Place the onion with the juice in the tray.

Mix the butter with the garlic and thyme, and season well. Using your fingers, loosen the skin from the breast of each chicken. Spread this mixture between the flesh and skin of the breast, pushing right to the back of the bird.

When the oven has reached the correct temperature, slide in the tray with the chickens. Let these cook slowly for 2 and a quarter hours or until the juice runs clear. Baste them with the tray juice half way through cooking. The skin will turn nicely golden and the meat will be tender. Pour the juice from the tray into saucepan with the onion. Loosely cover the birds with foil and leave to rest for 30 minutes before serving. 

Heat up the saucepan with the meat juices and add a glug of white wine. Simmer down, spooning off some of the fat. 

Meanwhile, whisk the dressing together in the bottom of a large bowl. Assemble the salad, making layers of the chicory, the radishes and the dates (if using). Toss the salad just before serving and layer with the sliced oranges. 

Serve the chicken warm with a light drizzle of gravy and a large helping of the orange salad.

Wednesday, May 30, 2012

FRESH GARLIC VICHYSSOISE

Too hot for soup. But not for a chilled one. 

This cooled soup is smooth and light, and thanks to the surprisingly enormous amount of fresh garlic, it has a lovely, earthy sweetness.

I imagine this to be eaten from a thermos in the park, or from tiny bowls with tiny poached quails egg to garnish. Oh, and if the weather forces on our anoraks, have it hot.

FRESH GARLIC VICHYSSOISE


serves 2

25g butter
1 tbsp olive oil
1 large onion, finely chopped
1 large leek, roughly chopped, white bit only
15 cloves fresh garlic, peeled and halved
1 potato, peeled and chopped
500ml chicken stock
150ml double cream
1/4 tsp ground mace or nutmeg
1/4 tsp salt, extra to serve
generous pinch coarsely ground black pepper
2 ice cubes
2 quails eggs (optional)
handful parsley leaves, finely chopped

Melt the butter in a medium pan and add the olive oil. Add the onion and slowly cook to soften but not colour. Then, add the leek and the halved garlic cloves and fry on a low heat for 5 minutes. Now add the potato and, after two minutes on a gentle heat, pour in the stock. Simmer the soup, unseasoned at this point, for 20 minutes. Do not bring to the boil as this may spoil the flavour of the garlic.  

Leave the soup to cool slightly before pouring it into a blender. Add the cream and seasoning and whizz. Pour, through a sieve, into a jug and taste - it may be tempting to add more at this stage but I'd leave it to cool completely before adding more salt. 

Making sure the soup has cooled down completely add the ice cubes to the jug, cover and leave in the fridge for an hour or until ready to serve.

Just before serving, bring a small pan of water to the boil. Take the pan off the heat. Drop in the shelled quails eggs, one by one, from a small cup that is almost touching the surface of the water. Leave to cook for 1 minute and remove with a slotted spoon.


Serve the soup into small bowls and carefully place the egg on top. Scatter with parsley and light drizzle of oil. 

Thursday, May 17, 2012

BROAD BEAN BRUSCHETTA

BROAD BEAN BRUSCHETTA

Spring on toast


serves 1-2

ingredients

250g broad beans, fresh best but frozen good too
1 garlic clove, roughly chopped
juice of 1/2 lemon
handful mint leaves, plus more to serve
3 tbsp olive oil, plus more to serve
2 tsp sugar, plus more to serve
1 tsp salt, plus more to serve

2 large slices of good bread


Bring a pan of water to the boil and add the broad beans. Bring to the boil again and simmer for 4 or so minutes. Drain and refresh under cool water and, if you have time, shell some or most of the beans. They are much easier to shell when cooked.

Add the beans to a small food processor and add the rest of the ingredients. Pulse about 20 times until you have a rough paste. If some beans have been missed out and are whole, leave them. They look lovely mixed through.

Taste the mixture. Add more salt to season, sugar to sweeten or lemon juice to sharpen up.

Toast the bread and spread over the broad beans. Scatter with mint leaves, a scrunch of black pepper, a pinch of sea salt flakes, and a generous drizzle of olive oil.

Serve for a light lunch with pea soup, chop up and serve as a canape or have for an unusual breakfast like I just have.

Wednesday, May 9, 2012

OX CHEEK RAGU


Melt. Slurp. Sigh... This is trattoria food at its most drool-worthy. The ox cheek turns from tough to tender over 6 hours and reduces down into a sauce so succulent you'll want to write a novel about it. 

This recipe - a new favourite - is ideal for feeding lots of people on the cheap - 500g of cheek cost me a fiver and was enough for 4 friends with giant appetites. It takes a while to cook - slow and low - but the only physical strain is putting it in the oven, taking it out and sharing it around. 

OX CHEEK RAGU WITH PAPPARADELLE

serves 4

ingredients

1 tbsp olive oil
500g ox cheek

1 large white onion, finely chopped
1 clove garlic, crushed
2 sticks celery, finely sliced
1 large red chilli, finely chopped
250ml water
300ml beer (I used smoked beer. Wine will work well too)
1 x 400g tin chopped tomatoes
1 bay leaf
2 sprigs fresh thyme
1/2 tsp salt
black pepper

400g papparadelle
Parmesan, grated, to serve

Preheat the oven to 180C. 

Heat the oil in a large, heavy based casserole and brown the cheeks all over. When brown and crisp, set aside. 

Add the onion to the oil and soften, following with the garlic, celery and chilli. Place the cheeks back in the pan and pour in the liquids. Add the chopped tomatoes, bay and thyme and season well. 


Lay a sheet of baking paper over the pan and cover with a lid so that the moisture is locked in.

Place the pan in the oven and leave for at least 4 hours to simmer away and slow-cook the meat. It will look like stew at this point but the meat will fall apart at the lightest touch.

Take the pan from the oven and remove the lid and baking paper. Leave the pan uncovered over a medium heat for approx. 20 minutes to reduce the excess liquid.

Just before serving, cook the pasta. Add sauce to the pasta and mix through. Serve piping hot with a generous helping of Parmesan.

Friday, May 4, 2012

CHEERIO BOOKS FOR COOKS

I'm raising a glass to a fabulous few years at Books For Cooks with this cracking cocktail and giving you something to kick off the Bank Holiday with.

ADIEU, AU REVOIR AND AHOY! TO NEW HORIZONS

A-DI-EU SARONNO


serves 4 glasses
8 cubes ice
4 shots amaretto di saronno
4 shots vodka
1 ltr still ginger beer (fizzy will do)
juice half an orange
4 round slices orange
12 small mint leaves
umbrella

Pulse the ice with all the liquids in a blender so that the ice crushes slightly. Pour into four glasses and garnish with the orange and mint. Say 'salut!' with a sun umbrella.

It's delicious. I think it's time for another...

Monday, April 23, 2012

WILD GARLIC AND RICOTTA RAVIOLI

We made these fresh, filled 'lunette' for Rosie and Jim's on Sunday and they went down a treat.

The wild garlic filling makes a vivid, pea green centre for the ravioli, splashing colour onto the plate when you cut through, like the perfect poached egg. 

Substitute the filling with fresh garlic and peppery rocket or artichoke hearts and fennel seed.
Serve as a light starter for a springtime lunch.

WILD GARLIC AND RICOTTA RAVIOLI


serves 4 and 20

PASTA
FOR 4                                                                                 FOR 20

400g 00 flour                                                                      1kg 00 flour
pinch salt                                                                            heavy pinch salt
4 free range eggs                                                                10 free range eggs

(roughly one egg per 100g flour)

FILLING
FOR 4                                                                                 FOR 20

1 bunch wild garlic, stems removed, flowers set aside      3 bunches wild garlic
200g ricotta                                                                        600g ricotta
50g Parmesan, grated                                                         200g Parmesan, grated
pinch nutmeg                                                                     1 tsp nutmeg
salt and pepper to taste

BUTTER
FOR 4                                                                                 FOR 20
200g butter                                                                         500g butter
1/2 bunch sage, finely chopped, stems removed               1 1/2 bunch sage
1 garlic clove                     


Pour the flour and salt into a large mixing bowl and make a well in the centre. Add the eggs to the well and beat evenly with a fork, gently incorporating the flour. When the mixture starts to form a more solid shape, use your hands, mixing in the flour until the dough loses most of its stick. 

Flour a table and take the dough from the bowl. Knead the dough for about 4 minutes until smooth, elastic, and silky. Wrap in clingfilm and place in the fridge to rest for up to 2 hours. 

Bring a pan of water to the boil and throw in the wild garlic. Blanch for 1 minute, drain, and refresh under cold water. When cooled, squeeze the garlic to remove excess water. 

Place the garlic with the ricotta into a food processor and blitz until smooth. Add the Parmesan, nutmeg, and a generous helping of salt and pepper. Cover, and place in the fridge to firm up.

Lay a tray with floured baking parchment ready for the ravioli.

Remove the pasta dough from the fridge and cut into bits roughly the size of the palm of your hand. If using a pasta machine (recommended) set to 1 and feed the dough through. Fold three times and feed through again. 

Set the machine to two and repeat. 

Now set the machine to 5 and feed through once. If making by hand, roll to roughly 2 mm thick. This will be thin enough to give you a light but firm enough ravioli.

Cut the dough with a 3 inch round cutter, making two leaves for each raviolo. 

Take the filling from the fridge. Fill the centre of one leaf of pasta with a tsp of the wild garlic. Place another leaf on top and press around the outside with your fingers so the dough sticks together. Making sure each side of the raviolo has been lightly floured, place on the baking sheet. Repeat with the rest of the pasta and filling. 

Once made, the ravioli can be covered and put back the fridge until ready to use.

Meanwhile, melt the butter in a pan, adding the garlic clove. Skim off any white froth and curd from the top, remove the garlic and add the chopped sage and salt.

When ready to serve, heat up the butter, and bring a large pan or two of salted water to the boil. Gently drop in the ravioli. When they float to the top, scoop out with a slotted spoon and place into bowls. 

Serve with the sage butter, the wild garlic flowers and a pinch of sea salt flakes.

- Too much pasta? Roll it up into a ball and freeze for another lunch -

Tuesday, April 17, 2012

BEETROOT GRATIN

For the holiest shade of crimson.

BEETROOT AND ONION GRATIN


serves 2

ingredients

250ml double cream
1 garlic clove, crushed
bunch of dill
salt and pepper
knob of butter
2-3 large raw beetroot, finely sliced
1 large red onion, finely sliced
100g Parmesan, grated


Preheat the oven to 200C.

Mix the cream with the garlic and dill, and season. Butter a small oval dish and lay the beetroot in the bottom. Alternate with onion and beetroot, pouring cream over each layer, until you reach the top of the dish. Scatter with Parmesan and season again.

Place in the oven for 1 hour.

Remove, cool slightly and serve with cold meats and salad or on its own.

Friday, April 6, 2012

MARMALADE HOT CROSS BUNS

Hot cross buns are a joy to make. They dress you in a pinny, cover you in flour, and make you instantly loved by everybody. Bring out a towering plate of warm sticky buns on Easter morning and you're anyone's.

Cut in half, spread through a little (or a lot of) salted butter and melt into marmalade goodness.

MARMALADE HOT CROSS BUNS


makes about 16

ingredients

700g strong white bread flour
1 tsp salt
1 tsp mixed spice or a combination of ginger, nutmeg and cinnamon.
100g sugar
zest of 1 large orange
7g easy bake/fast-action yeast
1 duck egg (or 1 large hen egg), beaten
300ml milk, warm

1 tbsp flour
1 tbsp water

2 tbsps thin cut marmalade for glazing

Sieve the flour, salt, and spices into a large bowl. Make a well for the sugar, and add the zest and yeast. Pour in the egg and the tepid milk and mix, leaving to sit for a few minutes to activate the yeast.

Now, using your hands or a wooden spoon, fold the flour into the wet well, mixing to make a soft dough. If too wet and sticky add a little flour; if too dry add tepid milk a little at a time. Knead for roughly 5 minutes, pulling the dough away from you and pushing it with your palms and knuckles.

Oil and lightly flour the bowl. Sit the dough in the bowl, cover with a tea towel and place in a warm spot for an hour to prove.

Set the oven to the hottest it will go (roughly 240C).

Knock the air out of the dough on a floured surface, knead briefly, and set aside again to prove for 30 minutes or so.

Then, divide the dough into equal amounts (a small handful) and shape into balls. Lay into lines in a large roasting tin, leaving a three-finger sized gap between each bit of dough. Rest for 20 minutes, covered.

Mix 1 tbsp flour with 1 tbsp water. It should stretch nicely over the buns to form a cross. Do this after the dough has rested and place in the oven for 10 to 12 minutes until brown.

Remove onto a wire rack and glaze with the marmalade whilst still warm. Cut in half, toast again and smother with good butter. You may weep.

Get BAKING.

Friday, March 30, 2012

LAMB NECK with SALSA VERDE

It seems to be all about lamb this week and next with Easter around the corner. It's the best time of year for lovely Spring lamb, butterflied, if we're lucky, on a big, burning barbecue.

Lamb doesn't come cheap though - in fact it's getting pricier every year. If there's just a few to feed for your Easter lunch, buying a shoulder won't leave you much change for the spuds.

Using the neck of a lamb can be a fantastically cheap alternative. Find it at the Waitrose counter or at your butcher's, and get it cut to the size you need; I'd give at least 250g per person. Marinate it for a morning in oil, herbs, and spices, and flash it in the pan for a perfectly pink, perfectly tasty bit of meat, which won't cost you a shoulder and a leg.

LAMB NECK with SALSA VERDE


serves 2

ingredients

500g lamb neck (will cost about £3), boned, trimmed of sinew and excess fat
2 garlic cloves, crushed
1 red chilli, finely chopped
2 tbsps olive oil
salt and pepper

SALSA VERDE
1 handful parsley leaves
1 handful mint leaves
1 handful basil leaves
2 garlic cloves
1 tsp capers/ 2 cornichons
6 anchovies
1 tsp Dijon mustard
2 tbsps mild olive oil
salt and pepper

Rub the lamb with the garlic, chilli and olive oil, and season. Cover and set aside at room temperature for a few hours, or overnight in the fridge, removed a couple of hours before cooking.

Throw the salsa verde ingredients into a food processor or pulse with a hand blender until wet and smooth. Add more mustard, salt or olive oil to taste.

Place a clean, dry frying pan over a medium heat. (You can do this on the barbie too). When sizzling hot, add the lamb. Cook, on each side for 2 minutes. Repeat this process once or twice. This should leave you with a perfectly pink, juicy middle and a crispy outer. Set aside to rest for 30 minutes to tenderise the meat, lightly covered with a tea towel.

Cut widthways into 1cm slices and serve hot or cold with the salsa verde, new potatoes, crusty bread and soft buffalo mozzarella for a deliciously thrifty Easter feast.

Monday, March 26, 2012

ROSIE AND JIM'S POTATOES


CRUSHED NEW POTATOES

from Rosie and Jim's Sunday Lunch club
(Served with slow roast pork belly)

Serves 20 hungry Sunday lunchers

ingredients

butter and olive oil or juice from roasting meat
4kg new potatoes
2 large onions, roughly chopped, sliced and diced
1 large bunch sage, roughly chopped
lots of salt and pepper

Set the oven to 200C.

Meanwhile add the potatoes to a pan or two of cold water and bring to the boil. Turn to a simmer and cook for 20 minutes until they slide off a knife if poked. Drain and transfer to a large roasting tray.

Press down on the potatoes with the bottom of a saucepan so that they flatten and crack. Even better if some are mashed completely.

If you have any fat from roasting meat (I used the leftover fatty juices from pork belly - oink) then pour it over in abundance and toss through. If not, use melted butter and lots of olive oil. Sprinkle over the sage leaves, distribute the onion and throw on the salt and pepper. Pop the tray in the oven and leave for an hour or so to crisp up.

Try these alternatives for jazzing up the

BEEF - fresh horseradish/ gherkins (add at the end)
CHICKEN - pancetta/ sausages/ Parmesan
LAMB - mint/ wild garlic/ chilli
COD - tarragon/ capers/ garlic/ chorizo
NUT ROAST - parsley/ Gruyere

Thursday, March 15, 2012

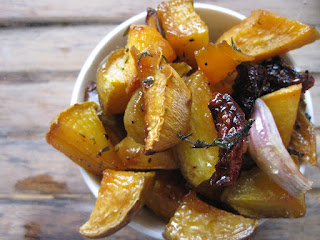
ROASTED SWEDE SALAD

My mother, born and brought up in Scotland, land of all things neep, said she won't touch swede for love nor money. Had too much, she said. Can't stand the stuff. Can't bear the smell. And even when I pulled out a perfect turnip she sniffed at it, told me to throw it to the hens. I know many more who would say the same.

This recipe is great for those who don't like, or think they don't like swede. Roasting it with honey, garlic and thyme kindly masks its sheepy, back-of-the-throat twang (a grower for sure) and softens the solid root to chewy flesh. Combine it with smoked bacon and crumbled feta and you have the mix of salt and sweet. It's an easy way in. Mum ate it, and went back for more.


WARM ROASTED SWEDE, BACON AND FETA SALAD


1 large swede serves 2

ingredients

1 large swede, scrubbed, removed of its top, cut into chunks or wedges
2 tbsps olive oil
3 cloves garlic, unpeeled
4 roasted cherry tomatoes
2 sprigs thyme
generous season of salt and pepper
4 rashers smoked streaky bacon
tsp balsamic vinegar
100g feta
toasted pumpkin seeds, optional
few leaves mint, to garnish

Preheat the oven to 200C.

Put the swede in a roasting tin with the olive oil, garlic, roasted herry tomatoes and thyme. Season well. Place in the oven for 45 minutes. Add the bacon and put back in until crispy. The swede should be chewy with crisp skin. Remove from the oven.

Pour the balsamic into the bottom of a large bowl and pour in the warm olive oil from the roasting tin. Whisk to emulsify and add the roasted swede and bacon. Crumble over the feta and pumpkin seeds, if using, and toss through. Garnish with mint and serve, warm, spreading the roasted garlic onto thick slices of bread. Swede, swede heaven.

Thursday, March 8, 2012

PORK BELLY WITH RHUBARB

This is so bloomin' scrumptious it doesn't even need a write-up. Apart from to say that, though the pork weeps with fatty joy and the skin is crisper than a morning in March, it's the rhubarb that really makes it.

PORK BELLY WITH RHUBARB


NOTE: You need 5 minutes the night before to prepare this.

serves 2
ingredients

500g pork belly, boned, scored (you can ask your butcher to do this)
2 cloves garlic, crushed
4 leaves sage
seasoning

olive oil
1 1/2 tsp sea salt flakes

1 glass cider
1 carrot, roughly chopped
1 stick celery, roughly chopped
1 shallot, peeled and quartered
1 bay leaf

2 sticks rhubarb, chopped into 1inch batons
1 tbsp sugar
1 tbsp water

Overnight or at least 8 hours before:

Rub the sides and bottom of the belly with the crushed garlic, chopped sage, oil, salt and pepper, avoiding the skin completely.

Cover with cling film and leave to rest in the fridge.

4 and a bit hours before serving:

Preheat the oven to the highest it can go or to about 230C.

Rub the pork skin with a little olive oil and the sea salt flakes. Place skin side up on a grate over a roasting tray and place in the oven for 45 minutes until the skin is crisp and brown and starting to bubble and burst.

Meanwhile, pour the cider, veg and bay into another roasting tray.

When it's time to remove the pork, turn the oven down to 180C. Place the meat on top of the veg and cider. Cover the edges of the baking tray with foil, leaving the skin exposed, so that the cider can steam up through the bottom to make the juiciest of meat. The skin will continue to crisp and be pretty solid when you serve it. Cook for a further 3 hours until, when poked with a skewer, there is no resistance from the pork.

Remove from the oven and leave to rest, loosely covered with tin foil.

Throw the rhubarb, sugar and water into a saucepan and place over a medium heat until soft and stringy. You want it still to be sharp so it cuts through the salty pork.

Slice the pork into large squares and serve alongside the lovely, rosey rhubarb.